Posted on May 17, 2023
The Revolutionary Method of Pipe Relining: The Future of Fixing Sewer Leaks
Introduction
Sewer leaks are a common and troublesome issue that property owners face. Traditional methods of fixing sewer leaks often involve extensive excavation, disruption to the property, and high costs. However, a revolutionary method called pipe relining has emerged as a game-changer in the field of sewer repair. This article will explore the benefits and process of pipe relining, highlighting why it is considered the future of fixing sewer leaks. Using a domestic pipe relining Sydney service is a very successful alternative to the traditional route – excavating and rehabilitating degrading pipework.
Understanding the Problem: Sewer Leaks and Traditional Solutions
Sewer leaks can cause significant damage to properties, leading to foul odors, structural issues, and even health hazards. Traditionally, fixing sewer leaks involved excavating the affected area, removing the damaged pipe, and replacing it with a new one. This process was not only time-consuming and expensive but also caused disruption to the property and inconvenience to the occupants.
Introducing Pipe Relining: A Revolutionary Method
Pipe relining is a revolutionary method that eliminates the need for extensive excavation and pipe replacement. Instead, it involves creating a new, seamless pipe within the existing damaged pipe, effectively sealing leaks and restoring the structural integrity of the sewer system. This innovative approach has gained popularity due to its numerous advantages over traditional methods.
How Does Pipe Relining Work?
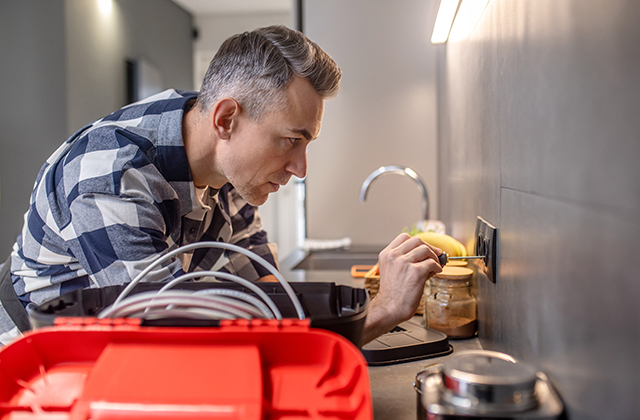
The pipe relining process begins with a thorough inspection of the damaged pipe using advanced camera technology. This allows the technicians to assess the extent of the damage and determine if pipe relining is a suitable solution. Once confirmed, the next step is to clean the pipe thoroughly, removing any debris or blockages that may hinder the relining process.
After the cleaning process, a specially formulated epoxy resin is introduced into the damaged pipe. This resin is then evenly distributed and molded against the inner walls of the pipe using an inflatable bladder or a robotic system. The resin is left to cure, which typically takes a few hours, depending on the specific product used. Once the resin has fully hardened, the bladder or robotic system is removed, leaving behind a new, seamless pipe that is resistant to leaks and corrosion.
Advantages of Pipe Relining
Pipe relining offers several advantages over traditional pipe replacement methods:
- Cost-effective Solution: Pipe relining is generally more cost-effective than traditional pipe replacement. It eliminates the need for extensive excavation and reduces labor and material costs.
- Minimal Disruption to Property: Unlike traditional methods that require extensive excavation, pipe relining minimizes disruption to the property. There is no need to dig up large sections of the landscape or destroy driveways, gardens, or other structures.
- Long-lasting Results: Pipe relining creates a durable and long-lasting solution. The epoxy resin used in the process forms a seamless, jointless pipe within the existing damaged pipe, reducing the risk of future leaks and extending the lifespan of the sewer system.
- Environmentally Friendly: Pipe relining is an environmentally friendly solution. It eliminates the need for pipe replacement, which reduces the consumption of new materials and minimizes waste.
- Faster Completion Time: Pipe relining typically takes less time to complete compared to traditional methods. The absence of extensive excavation and pipe replacement allows for a quicker repair process, minimizing inconvenience for property owners.
Professional Pipe Relining Process
Pipe relining is a specialized process that requires professional expertise. Here are the key steps involved:
- Inspection and Assessment: A thorough inspection of the damaged pipe is conducted using advanced camera technology. This helps in assessing the extent of the damage and determining the feasibility of pipe relining as a solution.
- Cleaning and Preparation: The damaged pipe is thoroughly cleaned using high-pressure water jetting or mechanical tools. This removes any debris, sediment, or blockages that may obstruct the relining process.
- Relining the Pipe: A specially formulated epoxy resin is introduced into the damaged pipe. This resin is evenly distributed and molded against the inner walls of the pipe using an inflatable bladder or a robotic system. The resin is allowed to cure and harden, forming a new, seamless pipe.
- Final Inspection and Testing: Once the resin has fully cured, a final inspection is conducted to ensure the quality and integrity of the relined pipe. Pressure testing may also be performed to verify its strength and leak resistance.
Common Applications of Pipe Relining
Pipe relining can be applied to various settings and infrastructure. Some common applications include:
- Residential Properties: Pipe relining is an ideal solution for fixing sewer leaks in residential properties, including houses, apartments, and condominiums. It provides a cost-effective and efficient method of restoring the sewer system without causing significant disruption to the occupants.
- Commercial Buildings: Pipe relining is widely used in commercial buildings, such as offices, hotels, restaurants, and shopping centers. It allows for efficient repairs without disrupting the business operations and customer experience.
- Municipal Infrastructure: Pipe relining is also applicable to municipal infrastructure, including underground sewers, stormwater drains, and sewage treatment plants. It offers a sustainable and cost-effective solution for maintaining and repairing public sewer systems.
Choosing the Right Pipe Relining Company
When considering pipe relining, it is crucial to choose a reputable and experienced company. Here are some factors to consider:
- Experience and Expertise: Look for a company with a proven track record in pipe relining. Experience and expertise ensure a successful and reliable repair process.
- Quality Materials and Equipment: Ensure that the company uses high-quality materials and advanced equipment for pipe relining. This contributes to the longevity and effectiveness of the repaired sewer system.
- Customer Reviews and Testimonials: Read customer reviews and testimonials to gauge the company’s reputation and customer satisfaction. Positive feedback and recommendations indicate a reliable service provider.
Conclusion
Pipe relining is a revolutionary method that offers numerous advantages over traditional pipe replacement methods. It provides a cost-effective, efficient, and environmentally friendly solution for fixing sewer leaks. With minimal disruption to the property and long-lasting results, pipe relining is paving the way for the future of sewer repair. When considering pipe relining, it is important to choose a reputable company with experience, expertise, and a commitment to quality. Say goodbye to the hassles of traditional sewer repairs and embrace the innovative method of pipe relining for a reliable and sustainable solution. Find out the most innovative method of pipe relining.


Posted on May 17, 2023
Custom Glass Costs Demystified: The Ultimate Guide for Homeowners
Glass is a versatile material that adds elegance and functionality to any home. When it comes to customizing glass for specific purposes, such as windows, doors, shower enclosures, or tabletops, homeowners often wonder about the costs involved. Custom glass costs can vary depending on various factors, including the type of glass, size, shape, edgework, and additional features. In this ultimate guide, we will demystify custom glass costs and provide homeowners with valuable insights to make informed decisions. Cathedral glass are thicker at the bottom and but the fascinating ancient glass adds beauty to your home.
Understanding Custom Glass
Definition and Types of Custom Glass
Custom glass refers to glass products that are tailored to specific measurements and requirements, allowing homeowners to achieve a personalized touch in their living spaces. It can include various types of glass, such as tempered glass, laminated glass, frosted glass, tinted glass, and patterned glass. Each type offers unique characteristics and aesthetic appeal, making them suitable for different applications.
Benefits of Custom Glass
Opting for custom glass offers numerous benefits to homeowners. Firstly, it allows for design flexibility, enabling the creation of unique and visually appealing elements within the home. Custom glass can enhance natural light transmission, create an illusion of space, and provide privacy when needed. Additionally, custom glass is typically made to higher quality standards, ensuring durability and longevity.
Factors Influencing Custom Glass Costs
Several factors influence the overall costs of custom glass. By understanding these factors, homeowners can gain insights into the pricing structure and make cost-effective decisions. The primary factors include the type and thickness of glass, the size and shape of the glass piece, the edgework and finishing options chosen, and any additional features or customization requested.
Determining Factors for Custom Glass Costs
To accurately estimate custom glass costs, it’s essential to consider various determining factors. Let’s explore these factors in detail.
Glass Type and Thickness
The type of glass chosen significantly impacts the overall cost. Tempered glass, for instance, is more expensive than standard glass due to its enhanced strength and safety features. Laminated glass, which offers improved sound insulation and security, also tends to have higher costs. Additionally, the thickness of the glass plays a role in pricing, as thicker glass requires more material and processing.
Size and Shape of Glass
The size and shape of the custom glass piece directly affect its cost. Larger pieces of glass will naturally cost more due to the increased material and manufacturing requirements. Unusual or intricate shapes may also add to the costs, as they may require specialized equipment and additional labor to create.
Edgework and Finishing
The edgework and finishing options chosen for custom glass can impact the overall costs. Different edgework styles, such as flat polished, beveled, or seamed edges, come with varying price points. Additionally, the choice of finishing, such as clear, frosted, or tinted, can also affect the cost.
Additional Features and Options
Custom glass often offers various additional features and options, such as drilled holes for hardware, decorative etching, or UV protection coatings. These features can add to the overall costs, as they require additional processes and materials.
Comparing Custom Glass Costs
When considering custom glass for your home, it’s essential to compare costs from different sources. Here are some options to consider:
Local Suppliers and Retailers
Local glass suppliers and retailers often provide custom glass services. It’s worth reaching out to them to get quotes and compare prices. Keep in mind that their pricing may vary based on factors such as location and overhead costs.
Online Glass Retailers
Online retailers specializing in glass products can offer competitive pricing for custom glass. Take advantage of online platforms to compare prices and read customer reviews. However, be sure to factor in shipping costs and verify the credibility of the retailer.
Custom Glass Fabricators
Working directly with custom glass fabricators can provide a more personalized experience. Fabricators can guide you through the design process and offer competitive pricing for tailor-made glass. Research and reach out to reputable fabricators in your area to get quotes and discuss your project requirements.
Cost Considerations
While comparing custom glass costs, keep in mind that price shouldn’t be the sole determining factor. Consider the reputation of the supplier or fabricator, the quality of materials used, and any warranties or guarantees offered. It’s important to strike a balance between cost and quality to ensure a satisfactory outcome.
Tips for Saving on Custom Glass Costs
While custom glass costs can vary, there are ways to save money without compromising on quality. Consider the following tips:
Research and Compare Prices
Take the time to research and compare prices from different suppliers, retailers, and fabricators. Obtain multiple quotes and evaluate the services provided. Remember to consider the reputation and reliability of the provider as well.
Optimize Glass Size and Shape
Choosing standard sizes and shapes for your custom glass can help reduce costs. Custom shapes and larger sizes often involve more labor and materials, leading to higher prices. Work with your supplier or fabricator to find cost-effective alternatives that still meet your design requirements.
Minimize Additional Features
While additional features can enhance the aesthetics and functionality of custom glass, they can also increase costs. Determine which features are essential and prioritize them accordingly. Avoid unnecessary extras that might inflate the overall price.
Consider DIY Installation
If you’re skilled and comfortable with DIY projects, installing custom glass yourself can save money on labor costs. However, be sure to thoroughly research and understand the installation process, as improper installation can lead to safety risks or damage to the glass.
Conclusion
Custom glass offers homeowners the opportunity to add a personalized touch to their living spaces. By understanding the factors that influence custom glass costs and exploring different options, homeowners can make informed decisions. Remember to compare prices, consider quality and reputation, and explore cost-saving strategies. With careful planning and research, homeowners can achieve their desired custom glass elements while staying within budget. Willoughbyglass.com.au carefully planned in installing the glass in your home.
Updated on April 26, 2023
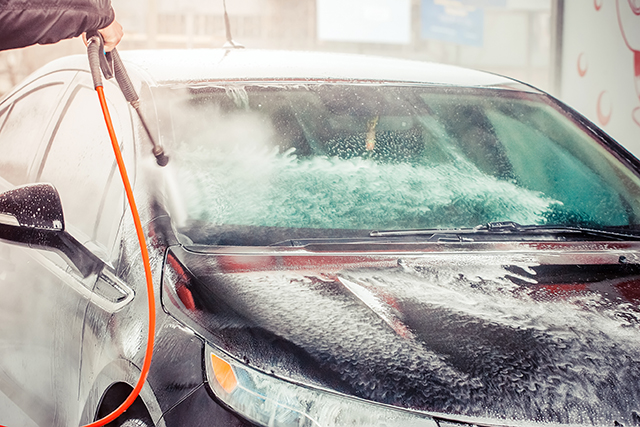
Say Goodbye to Dirt and Grime: Expert Car Washing Tips for a Gleaming Finish
As car owners, we know how important it is to keep our beloved vehicles clean and well-maintained. Not only does a clean car look more appealing, but regular car washing is also crucial for protecting the paint and preventing damage from dirt, grime, and environmental contaminants. In this article, we will share expert car washing tips that will help you achieve a gleaming finish and say goodbye to dirt and grime!
Gather Your Supplies
Before you start washing your car, it’s essential to gather all the necessary supplies. Having the right tools and products will make your car washing experience more effective and efficient. Here’s a list of supplies you’ll need:
- Bucket: Use a large, clean bucket to hold soapy water.
- Car wash soap: Choose a high-quality car wash soap specifically designed for automotive use.
- Microfiber wash mitt or sponge: Avoid using regular household sponges as they can scratch the paint.
- Hose or pressure washer: Use a hose with a spray nozzle or a pressure washer to rinse your car.
- Microfiber towels or drying aids: Use soft, absorbent microfiber towels or drying aids to dry your car.
Prep Your Car
Once you have gathered your supplies, it’s time to prep your car for washing. This step is crucial to remove loose dirt and debris before applying soap to prevent scratching the paint. Follow these steps to properly prep your car:
- Rinse your car: Use a hose or pressure washer to thoroughly rinse your car, starting from the top and working your way down. This will help remove loose dirt and debris.
- Foam your car: Use a foam cannon or foam gun to apply a layer of foamy soap to your car. The foam will help lift dirt and grime from the surface of your car, making it easier to wash.
Washing Techniques
Now that your car is prepped, it’s time to start washing! Follow these expert washing techniques to ensure a thorough and safe car wash:
- Use the two-bucket method: Fill one bucket with soapy water and another with clean water. Dip your wash mitt or sponge in the soapy water, then wash one section of your car at a time, starting from the top and working your way down. Rinse your wash mitt or sponge in the clean water bucket after each section to remove dirt and prevent scratching the paint.
- Wash in straight lines: Use straight, overlapping motions
- to wash your car, avoiding circular motions as they can cause swirl marks on the paint.
- Pay attention to the wheels and tires: Don’t forget to clean your wheels and tires thoroughly using a separate wash mitt or sponge. These areas tend to accumulate dirt and grime, and regular cleaning will help prevent damage.
- Rinse frequently: Rinse your car frequently with a hose or pressure washer to remove soap residue and prevent it from drying on the paint.
- Dry your car properly: After washing, use soft, absorbent microfiber towels or a drying aid to dry your car thoroughly. Avoid air-drying or letting water evaporate on the paint, as it can leave water spots and streaks.
Detailing Your Car
To achieve a gleaming finish, it’s important to pay attention to detailing your car. This step involves cleaning and polishing both the interior and exterior of your car to give it a showroom-worthy appearance. Follow these tips for effective detailing:
- Interior detailing: Vacuum the carpets, seats, and floor mats to remove dirt and debris. Use interior cleaner and microfiber towels to clean the dashboard, door panels, and other surfaces. Don’t forget to clean the windows and mirrors with a streak-free glass cleaner for a clear view.
- Exterior detailing: Use a clay bar to remove contaminants from the paint, such as tar, sap, and bird droppings. Follow up with a high-quality polish or compound to remove scratches and restore the shine of the paint. Finish with a coat of wax or sealant to protect the paint from UV rays and other environmental damage.
Protecting Your Car’s Finish
To maintain a gleaming finish on your car, it’s important to protect the paint from future damage. This can be achieved by regularly applying wax or sealant to create a barrier against dirt, grime, and UV rays. Follow these steps for effective paint protection:
- Choose the right product: Select a high-quality car wax or sealant that is specifically designed for automotive use. Consider factors such as durability, ease of application, and longevity.
- Follow the instructions: Read and follow the instructions on the product label for best results. Apply the wax or sealant evenly using a clean, soft applicator pad or microfiber towel.
- Use a dual-action polisher: For an extra layer of protection, consider using a dual-action polisher to apply the wax or sealant. This can help ensure an even application and better bonding with the paint.
- Apply regularly: Depending on the product, wax or sealant may need to be reapplied every 3-6 months. Follow the manufacturer’s recommendations for the best results.
Troubleshooting
During the car washing process, you may encounter some issues that can affect the final result. Here are some common troubleshooting tips to overcome these issues:
- Swirl marks: Swirl marks are tiny scratches on the paint that can occur due to improper washing techniques or using a dirty wash mitt or sponge. To avoid swirl marks, always use a clean wash mitt or sponge and wash in straight lines, avoiding circular motions.
- Water spots: Water spots can occur when water droplets evaporate on the paint, leaving behind mineral deposits. To remove water spots, use a mixture of water and vinegar or a dedicated water spot remover, and follow up with a thorough rinse and dry.
- Stubborn stains: Stubborn stains, such as bird droppings or tree sap, can be challenging to remove. Use a dedicated stain remover or clay bar to gently lift the stain without scratching the paint. Follow up with a polish and wax to restore the shine.
Maintenance Tips
To keep your car looking pristine between washes, follow these maintenance tips:
- Regularly clean your car: Regularly remove dirt, debris, and bird droppings from your car’s surface to prevent them from damaging the paint. Use a gentle car wash soap and a microfiber mitt or sponge for regular cleaning.
- Avoid parking under trees: Tree sap, pollen, and bird droppings can cause damage to your car’s finish. Try to avoid parking your car under trees to minimize exposure to these contaminants.
- Use a car cover: If you park your car outdoors for extended periods of time, consider using a car cover to protect it from dirt, dust, and UV rays. Make sure the cover is clean and properly fitted to avoid scratching the paint.
- Avoid abrasive materials: When cleaning your car or wiping down the interior, avoid using abrasive materials that can scratch the surfaces. Stick to soft microfiber towels and gentle cleaning products designed for automotive use.
- Keep the interior clean: Regularly vacuum the carpets, seats, and floor mats, and wipe down the dashboard, door panels, and other surfaces to prevent dirt and debris from accumulating. Use a quality interior cleaner and protectant to keep the interior looking fresh and clean.
Conclusion
Taking care of your car’s appearance goes beyond just washing it. Proper car washing techniques, detailing, and paint protection are essential for maintaining a gleaming finish that will turn heads on the road. Follow the expert tips and techniques discussed in this article to say goodbye to dirt and grime and achieve a showroom-worthy finish for your car. Car wash kit is required for maintenance of your car.


